Ah, the social media content hamster wheel. You know the feeling. You need to post a video today, but you have no ideas. You scramble to film something, edit it quickly, and get it posted. Then you wake up tomorrow and the pressure is right back on. It’s exhausting, and it leads to inconsistent, often uninspired, content.
What if we told you there’s a better way? A method the pros use to stay consistent, reduce stress, and dramatically increase the quality of their video content.
It’s called batching, and it’s about to become your new best friend.
Batching is the process of dedicating a single block of time to one specific task—in this case, creating videos. By focusing your energy, you can create an entire month’s worth of high-quality social media video content in just one dedicated day. Here’s our step-by-step guide to making it happen.
Phase 1: The Prep Work (Before Your Filming Day)
This is the most critical phase. A successful filming day is 80% preparation. Do not skip these steps!
Step 1: Brainstorm Your Content Pillars
Don’t just list random video ideas. First, define 3-5 content pillars—these are the core themes or topics your brand talks about. For a marketing agency, they might be: 1) Video Tips, 2) Client Spotlights, 3) Marketing News, and 4) Behind-the-Scenes.
Now, brainstorm 5-6 video ideas for each pillar. Suddenly, you have 20-24 ideas ready to go. Think about common questions your customers ask, quick tips you can share, or myths you can bust.
Step 2: Outline and “Script” Your Videos
You don’t need a word-for-word teleprompter script (unless that’s your style). A simple bulleted list of talking points for each video is often enough. This small step saves you from rambling on camera, ensures you hit all your key points, and dramatically speeds up the filming process.
For a 30-second video, your outline might look like this:
- Hook: “Stop making this one mistake with your videos.”
- Point 1: Explain the mistake (e.g., bad audio).
- Point 2: Explain why it’s a mistake.
- CTA: “Follow for more video tips.”
Step 3: Schedule and Organize Everything
- Block the Day: Put an 8-hour “Filming Day” block on your calendar and treat it like an unbreakable appointment.
- Gather Your Props: Need to showcase a product? Need a whiteboard? Get everything in one place.
- Plan Your Outfits: To create visual variety, plan 2-3 simple outfit changes (e.g., switch a jacket, add a scarf, change your shirt). This makes it look like you filmed on different days.
Phase 2: The Filming Day (Execution is Everything)
The day is here. Your prep work is done. Now it’s time to execute.
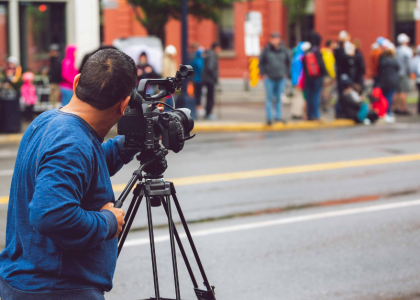
Step 4: Set Up Your “Studio”
Your studio can be a clean corner of your office with good natural light.
- Lighting: Set up facing a window. Natural light is your best friend.
- Audio: Use an external microphone. Your phone’s audio is okay, but a simple lavalier or USB mic makes you sound infinitely more professional.
- Stability: Prop your phone on a tripod or a stack of books. No one likes shaky-cam.
Do a quick test recording to check your light and sound before you start for real.
Step 5: Film in Batches (This is the Magic)
Do not film video #1 from start to finish, then move on to video #2. That’s inefficient. Instead, batch your actions.
- Film all your “talking head” segments for Outfit #1. Go through your list and record all the videos where you’re speaking to the camera in your first outfit.
- Change outfits.
- Film all your “talking head” segments for Outfit #2.
- Film your B-roll. Now, capture all the supplementary footage you need: shots of your product, your computer screen, you writing in a notebook, etc. Do it all at once.
This assembly-line approach keeps you in a creative flow and saves an incredible amount of time.
Phase 3: The Finish Line (Post-Production)
The filming is done, but you’re not finished yet.
Step 6: Edit, Edit, Edit
Transfer your footage to your computer and start editing. You can do this on the same day if you have the energy, or schedule it for the next.
- Trim the dead air at the beginning and end.
- Cut out major stumbles or long pauses.
- Add brand graphics or logos.
- Add captions! This is non-negotiable. 85% of social media videos are watched with the sound off.
Step 7: Schedule and Repurpose
You now have a folder full of finished videos. Use a social media scheduling tool (like Buffer, Later, or Meta Business Suite) to schedule them out for the entire month. Your social media is now on autopilot.
Bonus Tip: Look for repurposing opportunities. Can you take the audio from a great video tip and turn it into a podcast clip? Can you pull a powerful quote and create a graphic post? One filming day can fuel all of your content channels.
Freedom from the Hamster Wheel
By dedicating one focused day to creation, you free up the rest of your month to focus on what you do best: running your business. You get higher quality content, a consistent posting schedule, and a lot less daily stress. Batching content is just the beginning. Master your entire video workflow with our Ultimate Guide to Video Marketing.
Ready to implement a video strategy but don’t have the day to spare?
That’s where we come in. The team at VSmith Media handles this entire process for our clients—from strategy and scripting to filming and editing. We deliver a month’s worth of polished, lead-generating video content, so you can focus on your customers.
Contact us today for a free consultation and let’s take video off your to-do list for good.